Nếu server của bạn đang dùng HocVPS Script, hãy làm theo từng bước hướng dẫn này để cài đặt chứng chỉ SSL Let’s Encrypt miễn phí và được tự động gia hạn.
Let’s Encrypt là một nhà cung cấp chứng chỉ số SSL (Certificate Authority) hoàn toàn miễn phí, được nhiều cá nhân và tổ chức tin dùng và đặc biệt không giới hạn.
Trong bài viết này, mình sẽ hướng dẫn các bạn từng bước cài đặt chứng chỉ Let’s Encrypt trên server cài HocVPS Script (LEMP Server, CentOS 6 và 7). Nếu dùng shared hosting như Hawk Host hoặc StableHost, DreamHost, SiteGround thì mọi chuyện còn đơn giản hơn nhiều vì Let’s Encrypt đã được tích hợp sẵn trong cPanel, chỉ cần vài click là cài đặt thành công. Mời bạn tham khảo hướng dẫn cài đặt Let’s Encrypt trong cPanel.
Let’s Encrypt là chứng chỉ SSL loại Domain Validation tức là sau khi cài bạn sẽ có thanh ổ khoá màu xanh trên trình duyệt. Ngoài Let’s Encrypt còn có PositiveSSL của Comodo và Standard SSL DV của GoDaddy. cũng được rất nhiều người sử dụng.
Nếu cài xong mà thanh địa chỉ chưa hiện HTTPS màu xanh, hãy tham khảo bài Hướng dẫn cài đặt SSL “xanh hoàn hảo”
Nếu không nắm vững kiến thức kỹ thuật, hãy liên hệ sử dụng Dịch vụ Cài đặt SSL từ Học VPS.
Nội dung bài viết
1/ Cài đặt chứng chỉ Let’s Encrypt
1.2/ Phát hành chứng chỉ SSL Let’s Encrypt cho domain
3/ Cập nhật cấu hình trong Google Search Console và Analytics
4/ Tự động gia hạn Let’s Encrypt
1/ Cài đặt chứng chỉ Let’s Encrypt
1.1/ Cài đặt certbot
yum -y install certbot
1.2/ Phát hành chứng chỉ SSL Let’s Encrypt cho domain
Để phát hành chứng chỉ SSL Let’s Encrypt cho domain có rất nhiều cách, mình sẽ sử dụng option --standalone
# Stop Nginx
service nginx stop

# Issue SSL Let's Encrypt
certbot certonly --standalone
Chờ một lúc để Let’s Encrypt cài đặt những công cụ cần thiết. Sau đó bạn hãy nhập địa chỉ email, rồi nhấn phím Enter.

Chấp nhận quy định bằng cách nhập a, rồi nhấn tiếp Enter.
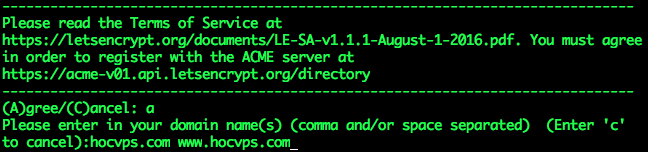
Tiếp theo bạn nhập tên miền sẽ sử dụng chứng chỉ SSL, rồi nhấn Enter. Bước này bạn chỉ nhập phiên bản non-www và www của 1 domain hoặc subdomain. Khi muốn thêm tên miền/subdomain khác bạn hãy xem hướng dẫn bên dưới.
Nếu không gặp vấn đề gì bạn sẽ gặp thông báo như bên dưới:
IMPORTANT NOTES:
 - Congratulations! Your certificate and chain have been saved at
 /etc/letsencrypt/live/hocvps.com/fullchain.pem. Your cert will
 expire on 2016-08-23. To obtain a new version of the certificate in
 the future, simply run Certbot again.
 - If you lose your account credentials, you can recover through
 e-mails sent to admin@hocvps.com.
 - Your account credentials have been saved in your Certbot
 configuration directory at /etc/letsencrypt. You should make a
 secure backup of this folder now. This configuration directory will
 also contain certificates and private keys obtained by Certbot so
 making regular backups of this folder is ideal.
 - If you like Certbot, please consider supporting our work by:

 Donating to ISRG / Let's Encrypt: https://letsencrypt.org/donate
 Donating to EFF: https://eff.org/donate-le
Lưu ý các thông tin mình bôi đỏ:
- /etc/letsencrypt/live/hocvps.com/: thư mục chứa các file chứng chỉ
- 2016-08-23: ngày hết hạn của chứng chỉ (90 ngày từ ngày cài)
Cài đặt chứng chỉ SSL Let’s Encrypt cho nhiều website
Nếu cần bổ sung thêm domain/subdomain muốn cài đặt Let’s Encrypt, bạn chỉ cần chạy lại lệnh bên dưới rồi nhập domain vào:
# Stop Nginx
service nginx stop

# Install Let's Encrypt
certbot certonly --standalone
Lúc này domain mới sẽ có thêm một thư mục riêng chứa file chứng chỉ cần thiết.
2/ Cấu hình Nginx
Sau khi có các file chứng chỉ, chúng ta sẽ chỉnh lại file cấu hình Nginx. Ví dụ tên miền của mình là hocvps.com thì file cấu hình sẽ có đường dẫn là /etc/nginx/conf.d/hocvps.com.conf
Khi làm bạn nhớ thay tương ứng hocvps.com bằng domain của bạn nhé.
Lưu ý: Chỉ cấu hình Nginx khi bạn đã phát hành thành công chứng chỉ SSL.
Tạo file DH parameters 2048 bit (tạo một lần duy nhất trên VPS)
mkdir /etc/nginx/ssl/
openssl dhparam 2048 -out /etc/nginx/ssl/dhparam.pem
Chỉnh sửa cấu hình domain bằng Nano Editor
nano /etc/nginx/conf.d/hocvps.com.conf
Cấu hình SSL xử lý các request
Trong block server { ... } thứ 2 điều chỉnh như sau:
+ Chuyển listen 80 default_server; thành listen 443 ssl default_server;
+ Sau dòng server_name hocvps.com; thêm đoạn cấu hình SSL:
	# SSL
	ssl_certificate /etc/letsencrypt/live/hocvps.com/fullchain.pem;
	ssl_certificate_key /etc/letsencrypt/live/hocvps.com/privkey.pem;
	ssl_protocols TLSv1 TLSv1.1 TLSv1.2;
	ssl_prefer_server_ciphers on;
	ssl_ciphers EECDH+CHACHA20:EECDH+AES128:RSA+AES128:EECDH+AES256:RSA+AES256:EECDH+3DES:RSA+3DES:!MD5;

        # Improve HTTPS performance with session resumption
        ssl_session_cache shared:SSL:50m;
        ssl_session_timeout 1d;

        # DH parameters
        ssl_dhparam /etc/nginx/ssl/dhparam.pem;
        # Enable HSTS
        add_header Strict-Transport-Security "max-age=31536000" always;
Redirect toàn bộ www http sang https
Trong block server { ... } ở phía trên cùng:
+ Chuyển server_name www.hocvps.com; thành server_name hocvps.com www.hocvps.com;
+ Chuyển rewrite ^(.*) http://hocvps.com$1 permanent; thành rewrite ^(.*) https://hocvps.com$1 permanent;
Kết quả được như sau:
server {
	listen 80;
	server_name hocvps.com www.hocvps.com;
	rewrite ^(.*) https://hocvps.com$1 permanent;
}
Lúc này khi truy cập https://hocvps.com và http://www.hocvps.com sẽ tự động redirect sang https://hocvps.com
Redirect toàn bộ www https sang https
Thêm mới block server { ... } ở trên cùng
server {
	listen 443 ssl;
	server_name www.hocvps.com;

	# SSL
	ssl_certificate /etc/letsencrypt/live/hocvps.com/fullchain.pem;
	ssl_certificate_key /etc/letsencrypt/live/hocvps.com/privkey.pem;
	ssl_protocols TLSv1 TLSv1.1 TLSv1.2;
	ssl_prefer_server_ciphers on;
	ssl_ciphers EECDH+CHACHA20:EECDH+AES128:RSA+AES128:EECDH+AES256:RSA+AES256:EECDH+3DES:RSA+3DES:!MD5;

	rewrite ^(.*) https://hocvps.com$1 permanent;
}
Lúc này khi truy cập https://www.hocvps.com sẽ tự động redirect sang https://hocvps.com
Cấu hình SSL với port quản lý HocVPS Script Admin
Lưu ý:
- Chỉ thiết lập đối với domain chính cài HocVPS – Domain phụ KHÔNG thiết lập.
- Đây chỉ là bước tùy chọn, nếu bạn sử dụng Cloudflare và kích hoạt đám mây màu vàng ẩn IP thì không làm bước này mà sử dụng link
http://IP:portđể vào khu vực quản trị HocVPS Script Admin.
Ví dụ khi cài đặt mình để port mặc định 2018 thì sẽ tìm block cuối cùng server { ... } trong file cấu hình domain .conf có dòng listen 2018;
Cấu hình SSL cho port HocVPS tương tự như bên dưới:
server {
	listen 2018 ssl;

 	access_log        off;
	log_not_found     off;
 	error_log         off;

    	root /home/hocvps.com/private_html;
	index index.php index.html index.htm;
    	server_name hocvps.com;

        error_page  497 https://$server_name:$server_port$request_uri;

	ssl_certificate /etc/letsencrypt/live/hocvps.com/fullchain.pem;
	ssl_certificate_key /etc/letsencrypt/live/hocvps.com/privkey.pem;
	ssl_protocols TLSv1 TLSv1.1 TLSv1.2;
	ssl_prefer_server_ciphers on;
	ssl_ciphers EECDH+CHACHA20:EECDH+AES128:RSA+AES128:EECDH+AES256:RSA+AES256:EECDH+3DES:RSA+3DES:!MD5;

	auth_basic "Restricted";
	auth_basic_user_file /home/hocvps.com/private_html/hocvps/.htpasswd;

	...
Lúc này truy cập HocVPS Script Admin qua https://domain.com:2018
File cấu hình Nginx cuối cùng sẽ tương tự như sau:
server {
	listen 443 ssl;
	server_name www.hocvps.com;

	# SSL
	ssl_certificate /etc/letsencrypt/live/hocvps.com/fullchain.pem;
	ssl_certificate_key /etc/letsencrypt/live/hocvps.com/privkey.pem;
	ssl_protocols TLSv1 TLSv1.1 TLSv1.2;
	ssl_prefer_server_ciphers on;
	ssl_ciphers EECDH+CHACHA20:EECDH+AES128:RSA+AES128:EECDH+AES256:RSA+AES256:EECDH+3DES:RSA+3DES:!MD5;

	rewrite ^(.*) https://hocvps.com$1 permanent;
}
server {
	listen 80;
	server_name hocvps.com www.hocvps.com;
	rewrite ^(.*) https://hocvps.com$1 permanent;
}

server {
	listen 443 ssl default_server;

	# access_log off;
	access_log /home/hocvps.com/logs/access.log;
	# error_log off;
    	error_log /home/hocvps.com/logs/error.log;

    	root /home/hocvps.com/public_html;
	index index.php index.html index.htm;
    	server_name hocvps.com;

	# SSL
	ssl_certificate /etc/letsencrypt/live/hocvps.com/fullchain.pem;
	ssl_certificate_key /etc/letsencrypt/live/hocvps.com/privkey.pem;
	ssl_protocols TLSv1 TLSv1.1 TLSv1.2;
	ssl_prefer_server_ciphers on;
	ssl_ciphers EECDH+CHACHA20:EECDH+AES128:RSA+AES128:EECDH+AES256:RSA+AES256:EECDH+3DES:RSA+3DES:!MD5;

        # Improve HTTPS performance with session resumption
        ssl_session_cache shared:SSL:50m;
        ssl_session_timeout 1d;

        # DH parameters
        ssl_dhparam /etc/nginx/ssl/dhparam.pem;
        # Enable HSTS
        add_header Strict-Transport-Security "max-age=31536000" always;

    	location / {
		try_files $uri $uri/ /index.php?$args;
	}

	# Custom configuration
	include /home/hocvps.com/public_html/*.conf;

    	location ~ \.php$ {
		fastcgi_split_path_info ^(.+\.php)(/.+)$;
        	include /etc/nginx/fastcgi_params;
        	fastcgi_pass 127.0.0.1:9000;
        	fastcgi_index index.php;
		fastcgi_connect_timeout 1000;
		fastcgi_send_timeout 1000;
		fastcgi_read_timeout 1000;
		fastcgi_buffer_size 256k;
		fastcgi_buffers 4 256k;
		fastcgi_busy_buffers_size 256k;
		fastcgi_temp_file_write_size 256k;
		fastcgi_intercept_errors on;
        	fastcgi_param SCRIPT_FILENAME /home/hocvps.com/public_html$fastcgi_script_name;
    	}
	location /nginx_status {
  		stub_status on;
  		access_log   off;
                allow 127.0.0.1;
                deny all;
	}
	location /php_status {
		fastcgi_pass 127.0.0.1:9000;
		fastcgi_index index.php;
		fastcgi_param SCRIPT_FILENAME  /home/hocvps.com/public_html$fastcgi_script_name;
		include /etc/nginx/fastcgi_params;
                allow 127.0.0.1;
                deny all;
    	}
	# Disable .htaccess and other hidden files
	location ~ /\.(?!well-known).* {
		deny all;
		access_log off;
		log_not_found off;
	}
        location = /favicon.ico {
                log_not_found off;
                access_log off;
        }
        location = /robots.txt {
                allow all;
                log_not_found off;
                access_log off;
        }
	location ~* \.(3gp|gif|jpg|jpeg|png|ico|wmv|avi|asf|asx|mpg|mpeg|mp4|pls|mp3|mid|wav|swf|flv|exe|zip|tar|rar|gz|tgz|bz2|uha|7z|doc|docx|xls|xlsx|pdf|iso|eot|svg|ttf|woff)$ {
	        gzip_static off;
		add_header Pragma public;
		add_header Cache-Control "public, must-revalidate, proxy-revalidate";
		access_log off;
		expires 30d;
		break;
        }

        location ~* \.(txt|js|css)$ {
	        add_header Pragma public;
		add_header Cache-Control "public, must-revalidate, proxy-revalidate";
		access_log off;
		expires 30d;
		break;
        }
}

server {
	listen 2018 ssl;

 	access_log        off;
	log_not_found     off;
 	error_log /home/hocvps.com/logs/nginx_error.log;

    	root /home/hocvps.com/private_html;
	index index.php index.html index.htm;
    	server_name hocvps.com;

        error_page 497 https://$server_name:$server_port$request_uri;

	ssl_certificate /etc/letsencrypt/live/hocvps.com/fullchain.pem;
	ssl_certificate_key /etc/letsencrypt/live/hocvps.com/privkey.pem;
	ssl_protocols TLSv1 TLSv1.1 TLSv1.2;
	ssl_prefer_server_ciphers on;
	ssl_ciphers EECDH+CHACHA20:EECDH+AES128:RSA+AES128:EECDH+AES256:RSA+AES256:EECDH+3DES:RSA+3DES:!MD5;

	auth_basic "Restricted";
	auth_basic_user_file /home/hocvps.com/private_html/hocvps/.htpasswd;

     	location / {
		autoindex on;
		try_files $uri $uri/ /index.php;
	}

    	location ~ \.php$ {
		fastcgi_split_path_info ^(.+\.php)(/.+)$;
        	include /etc/nginx/fastcgi_params;
        	fastcgi_pass 127.0.0.1:9000;
        	fastcgi_index index.php;
		fastcgi_connect_timeout 1000;
		fastcgi_send_timeout 1000;
		fastcgi_read_timeout 1000;
		fastcgi_buffer_size 256k;
		fastcgi_buffers 4 256k;
		fastcgi_busy_buffers_size 256k;
		fastcgi_temp_file_write_size 256k;
		fastcgi_intercept_errors on;
        	fastcgi_param SCRIPT_FILENAME /home/hocvps.com/private_html$fastcgi_script_name;
    	}

	location ~ /\. {
		deny all;
	}
}
_ Cấu hình SSL cho domain không phải domain chính trong HocVPS Script:
- Không thiết lập HocVPS Admin Port
- Bỏ tham số
default_serverbên cạnhlisten 443
_ Để kết hợp sử dụng CDN Cloudflare (biểu tượng đám mây vàng):
- Thiết lập Full (strict) trong menu Crypto SSL tại trang quản lý Cloudflare.
- Không cấu hình SSL phần Admin HocVPS. Khi đó, truy cập HocVPS Admin bằng
ip:port - Không thể gia hạn tự động SSL Let’s Encrypt. Gia hạn thủ công 3 tháng 1 lần.
_ Cấu hình HTTP/2 tham khảo Kích hoạt HTTP/2 với Nginx.
_ Tham khảo thêm Tối ưu HTTPS trên Nginx.
Kiểm tra lại cấu hình Nginx
nginx -t
Phản hồi như sau là ok:
nginx: the configuration file /etc/nginx/nginx.conf syntax is ok
nginx: configuration file /etc/nginx/nginx.conf test is successful
Khởi động lại Nginx
service nginx restart
Giờ truy cập vào domain để tận hưởng thành quả thôi.
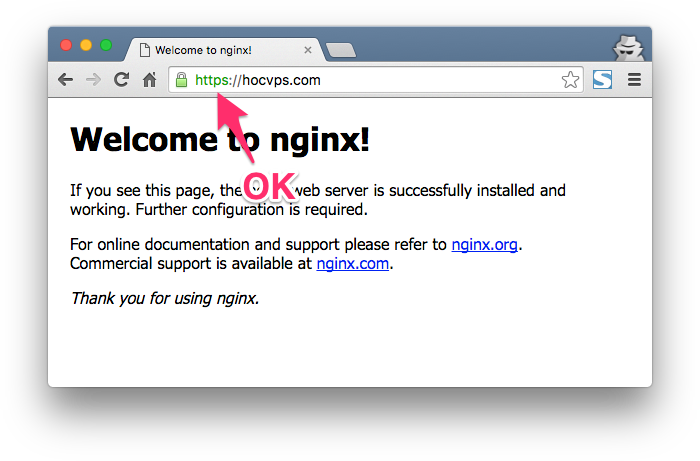
Lưu ý:
- Bạn phải chuyển toàn bộ link image, js, css từ http:// sang https:// thì mới có biểu tượng màu xanh như demo. Xem thêm hướng dẫn.
- Nếu bạn dùng WordPress, hãy cài đặt plugin Really Simple SSL để tự động redirect http sang https và chuyển toàn bộ link .css, .js sang https. Thanh địa chỉ lúc này sẽ có màu xanh.
- Nếu không muốn dùng plugin tự động Really Simple SSL, bạn hãy tham khảo thêm Hướng dẫn cài đặt Let’s Encrypt trong cPanel để biết cách thao tác thủ công.
3/ Cập nhật cấu hình trong Google Search Console và Analytics
Phần này bắt buộc phải làm để không làm ảnh hưởng đến thứ hạng từ khóa trên Google của website, mình đã có hướng dẫn chi tiết từng bước trên Canh Me, mời bạn tham khảo tại link này.
4/ Tự động gia hạn Let’s Encrypt
Chứng chỉ Let’s Encrypt chỉ sử dụng được trong vòng 90 ngày và bạn cần phải chạy lại dòng lệnh bên dưới để gia hạn.
certbot renew --pre-hook "service nginx stop" --post-hook "service nginx start"
Tuy nhiên, mình sẽ hướng dẫn các bạn cấu hình để tự động gia hạn chứng chỉ này với crontab, như vậy chúng ta sẽ sử dụng SSL miễn phí trọn đời mà không cần phải lo về việc gia hạn nữa.
Mở file cấu hình crontab:
# EDITOR=nano crontab -e
Copy và paste đoạn code bên dưới vào cửa sổ terminal:
30 2 * * * /usr/bin/certbot renew --pre-hook "service nginx stop" --post-hook "service nginx start" >> /var/log/le-renew.log
Nhấn Ctrl+O, Enter để lưu và Ctrl+X để thoát. Bạn nhận được thông báo sau là thành công
crontab: installing new crontab
crontab trên sẽ tự động chạy lệnh gia hạn Let’s Encrypt vào lúc 2h30 hàng ngày và kiểm tra xem đã hết hạn chưa và tiến hành gia hạn. Trước khi gia hạn sẽ stop Nginx, sau đó sẽ start lại ngay lập tức. Như vậy, gần như không ảnh hưởng gì cả đến website.
Vậy là xong, bạn có thể yên tâm sử dụng Let’s Encrypt rồi đấy.
Lưu ý: Nếu chứng chỉ không tự động gia hạn, kiểm tra theo mục 6.Một số vấn đề gặp phải
5/ Xóa chứng chỉ Let’s Encrypt
Khi bạn không sử dụng Let’s Encrypt nữa, chuyển qua sử dụng của nhà cung cấp khác và muốn xóa chứng chỉ Let’s Encrypt đã cài, hãy sử dụng lệnh bên dưới:
# Remove Let's Encrypt
certbot delete
Tiếp theo nhập số thứ tự chứng chỉ tương ứng với tên miền bạn muốn xóa, nhấn Enter là mọi thứ sẽ được dọn dẹp sạch sẽ.
6/ Một số vấn đề gặp phải
Đến ngày hết hạn mà chứng chỉ Let’s Encrypt không tự động gia hạn, mặc dù crontab vẫn chạy, kiểm tra log không thấy thông tin gì đặc biệt? Chạy lệnh gia hạn thủ công thì lại được. Theo kinh nghiệm của mình thì vấn đề ở mã nguồn Let’s Encrypt hoặc PATH service
Đối với vấn đề mã nguồn, chỉ cần clone lại bộ code của Let’s Encrypt là sẽ giải quyết được vấn đề.
# cd /opt/letsencrypt && git pull
Nếu gặp thông báo lỗi thì sử dụng lệnh này: # cd /opt/letsencrypt && git reset --hard && git pull
Đối với vấn đề PATH service, các bạn chú ý những dấu hiệu sau:
Kiểm tra nội dung /var/spool/mail/root thấy:
Failed to find executable /usr/sbin/service in PATH:/usr/local/sbin:/usr/local/bin:/sbin:/bin:/usr/sbin:/usr/bin:/root/bin
Unable to find pre-hook command /usr/sbin/service in the PATH.
(PATH is /usr/local/sbin:/usr/local/bin:/sbin:/bin:/usr/sbin:/usr/bin:/root/bin)
Kiểm tra nội dung /var/log/cron thấy cronjob vẫn chạy hàng ngày. Kiểm tra nội dung /var/log/le-renew.log và bên trong /var/log/letencrypt không thấy gì khả nghi.
– Nguyên nhân: service không nằm trong PATH, vấn đề này gặp ở 1 số VPS.
# whereis service
service: /sbin/service /usr/share/man/man8/service.8.gz
# echo $PATH
/usr/bin:/bin:/usr/sbin:/usr/local/bin:/usr/local/sbin
Có thể thấy, lệnh service nằm trong /sbin/service, không thuộc biến môi trường PATH. Crontab chỉ tìm /usr/sbin/service và không thấy.
– Giải pháp::
Bạn cần sử dụng đường dẫn cụ thể để chạy lệnh service trong crontab. Vị trí sẽ tùy thuộc vào từng hệ thống, kiểm tra bằng # whereis service.
Ví dụ, khi là /sbin/service thì câu lệnh chèn vào crontab sẽ như sau:
30 2 * * * certbot renew --pre-hook "/sbin/service nginx stop" --post-hook "/sbin/service nginx start" >> /var/log/le-renew.log
– Dấu hiệu: Đến ngày hết hạn thì không thể renew, với thông báo:
Renewal configuration file /etc/letsencrypt/renewal/hocvps.com.conf produced an unexpected error: [('PEM routines', 'PEM_read_bio', 'no start line')]. Skipping.

No renewals were attempted.
Hoặc expected /etc/letsencrypt/live/hocvps.com/cert.pem to be a symlink
– Nguyên nhân: Bộ chứng chỉ bị corrupt khiến Let’s Encrypt không thể đọc và renew.
Kiểm tra nội dung cert và private key:
# openssl x509 -noout -text -in /etc/letsencrypt/live/hocvps.com/cert.pem
unable to load certificate
3077703404:error:0906D06C:PEM routines:PEM_read_bio:no start line:pem_lib.c:703:Expecting: TRUSTED CERTIFICATE
# openssl rsa -noout -text -in /etc/letsencrypt/live/hocvps.com/privkey.pem -check
unable to load Private Key
3078170348:error:0906D06C:PEM routines:PEM_read_bio:no start line:pem_lib.c:703:Expecting: ANY PRIVATE KEY
Kiểm tra MD5 của cert và key (trùng nhau là ok):
# openssl x509 -noout -modulus -in fullchain.pem | openssl md5
# openssl rsa -noout -modulus -in privkey.pem | openssl md5
Kiểm tra danh sách cert trong VPS
#  certbot certificates
Found the following certs:
  Certificate Name: hocvps.com
    Domains: hocvps.com www.hocvps.com
    Expiry Date: 2018-05-27 09:15:09+00:00 (VALID: 89 days)
    Certificate Path: /etc/letsencrypt/live/hocvps.com/fullchain.pem
    Private Key Path: /etc/letsencrypt/live/hocvps.com/privkey.pem
-------------------------------------------------------------------------------
– Giải pháp: xóa hoàn toàn cert cũ rồi issue lại cert mới (như mục 1.)
# cd /opt/letsencrypt
# ./certbot delete --cert-name hocvps.com
Saving debug log to /var/log/letsencrypt/letsencrypt.log
-------------------------------------------------------------------------------
Deleted all files relating to certificate hocvps.com.
-------------------------------------------------------------------------------
– Nguyên nhân & Dấu hiệu:
VPS không thể kết nối ra ngoài qua giao thức HTTPS, khi đó cũng không thể issue/renew các chứng chỉ SSL. Ví dụ không thể truy cập qua HTTPS
# curl https://google.com
curl: (77) Problem with the SSL CA cert (path? access rights?)
#curl https://github.com/letsencrypt/letsencrypt
curl: (35) SSL connect error
– Giải pháp:
Đối với lỗi (77): cài đặt lại chứng chỉ trong VPS:
Bước 1: Di chuyển/Đổi tên chứng chỉ cũ
- CentOS6 chứng chỉ lưu tại
/etc/ssl/certs/ca-bundle.crt - CentOS7 chứng chỉ lưu tại
/etc/pki/ca-trust/extracted/pem/tls-ca-bundle.pem
Bước 2: Cài đặt lại chứng chỉ. Khi đó, bạn có thể curl HTTPS và issue/renew chứng chỉ bình thường.
# yum reinstall -y ca-certificates
– Đối với lỗi (35) – Cập nhật NSS
# yum update nss -y
Chúc bạn thành công.
Chào luân : vps minh báo lỗi thế này ne:raceback (most recent call last):
File “/opt/eff.org/certbot/venv/lib64/python3.4/site-packages/requests/packages/urllib3/connection.py”, line 138, in _new_conn
(self.host, self.port), self.timeout, **extra_kw)
File “/opt/eff.org/certbot/venv/lib64/python3.4/site-packages/requests/packages/urllib3/util/connection.py”, line 98, in create_connection
raise err
File “/opt/eff.org/certbot/venv/lib64/python3.4/site-packages/requests/packages/urllib3/util/connection.py”, line 88, in create_connection
sock.connect(sa) minh có thể fix lỗi này thế nào được. Nhờ Luân phản hồi giúp minh
Lỗi này bạn chạy cài đặt lại xem được không
Chào việt phương !
chạy lai ma nó báo vậy việt phương à. còn cách fix nào nữa không à việt phương
Cho mình nội dung của /etc/hosts. Và câu lệnh tạo chứng chỉ của bạn là gì?
Phương ơi cho mình hỏi, OpenSSL với Let’s Encrypt SSL có phải OpenSSL load chậm hơn ko? bữa Tính cài Let’s Encrypt SSL rồi, sau đó xoá cài lại OpenSSL thì thấy load site chậm hơn hẳn.
Mình không vào được phpmyadmin sau khi cài SSL. Có hỏi bên hoidap rồi mà lâu quá không được bạn nào support nên đành hỏi ở đây để nhờ vậy.
Link bên hoidap.hocvps.com: https://hoidap.hocvps.com/t/topic/2456/11
Okie bạn. Case bạn mình chuyển trả lời qua mail nhé
Done. Lưu ý các bạn là sửa Nginx Conf theo đúng HocVPS Port các bạn đã lựa chọn khi cài đặt nhé
Em bị lỗi ERR_BAD_SSL_CLIENT_AUTH_CERT nên không vào được web.
Ngồi cài SSL thì bị lỗi này, nhờ anh chỉ giúp
Failed authorization procedure.domain.vn (http-01): urn:acme:error:tls :: The server experienced a TLS error during domain verification :: Fetching https://domain.vn/.well-known/acme-challenge/z6Vq5xay08IoCLMMopcU2jQMIhYpkDrWVWDp73hsv7I: remote error: tls: handshake failure
IMPORTANT NOTES:
– The following errors were reported by the server:
Domain: domain.vn
Type: tls
Detail: Fetching
https:///domain.vn/.well-known/acme-challenge/z6Vq5xay08IoCLMMopcU2jQMIhYpkDrWVWDp73hsv7I:
remote error: tls: handshake failure
To fix these errors, please make sure that your domain name was
entered correctly and the DNS A/AAAA record(s) for that domain
contain(s) the right IP address. Additionally, please check that
you have an up-to-date TLS configuration that allows the server to
communicate with the Certbot client.
Cert lỗi không thể xác minh. Bạn kiểm tra các domain có trỏ về IP VPS không (cả www và non-www) và KHÔNG bật đám mây vàng Cloudflare ?
ad giúp em với, hiện giờ ko vào dc site nữa :((
em bị lỗi này
[root@thaipro home]# nginx -t
nginx: [emerg] “location” directive is not allowed here in /etc/nginx/conf.d/thaipro.ws.conf:48
nginx: configuration file /etc/nginx/nginx.conf test failed
[root@thaipro home]# service nginx restart
Redirecting to /bin/systemctl restart nginx.service
Job for nginx.service failed because the control process exited with error code. See “systemctl status nginx.service” and “journalctl -xe” for details.
file config của e đây
server {
listen 443 ssl;
server_name http://www.thaipro.ws;
# SSL
ssl_certificate /etc/letsencrypt/live/thaipro.ws/fullchain.pem;
ssl_certificate_key /etc/letsencrypt/live/thaipro.ws/privkey.pem;
ssl_protocols TLSv1 TLSv1.1 TLSv1.2;
ssl_prefer_server_ciphers on;
ssl_ciphers EECDH+CHACHA20:EECDH+AES128:RSA+AES128:EECDH+AES256:RSA+AES256:EECDH+3DES:RSA+3DES:!MD5;
rewrite ^(.*) https://thaipro.ws$1 permanent;
}
server {
listen 80;
server_name thaipro.ws http://www.thaipro.ws;
rewrite ^(.*) https://thaipro.ws$1 permanent;
}
server {
listen 443 ssl default_server;
# access_log off;
access_log /home/thaipro.ws/logs/access.log;
# error_log off;
error_log /home/thaipro.ws/logs/error.log;
root /home/thaipro.ws/public_html;
index index.php index.html index.htm;
server_name thaipro.ws;
# SSL
ssl_certificate /etc/letsencrypt/live/thaipro.ws/fullchain.pem;
ssl_certificate_key /etc/letsencrypt/live/thaipro.ws/privkey.pem;
ssl_protocols TLSv1 TLSv1.1 TLSv1.2;
ssl_prefer_server_ciphers on;
ssl_ciphers EECDH+CHACHA20:EECDH+AES128:RSA+AES128:EECDH+AES256:RSA+AES256:EECDH+3DES:RSA+3DES:!MD5;
# Improve HTTPS performance with session resumption
ssl_session_cache shared:SSL:50m;
ssl_session_timeout 1d;
# DH parameters
ssl_dhparam /etc/nginx/ssl/dhparam.pem;
# Enable HSTS
add_header Strict-Transport-Security “max-age=31536000” always;
location / {
try_files $uri $uri/ /index.php?$args;
}
# Custom configuration
include /home/thaipro.ws/public_html/*.conf;
location ~ \.php$ {
fastcgi_split_path_info ^(.+\.php)(/.+)$;
include /etc/nginx/fastcgi_params;
fastcgi_pass 127.0.0.1:9000;
fastcgi_index index.php;
fastcgi_connect_timeout 1000;
fastcgi_send_timeout 1000;
fastcgi_read_timeout 1000;
fastcgi_buffer_size 256k;
fastcgi_buffers 4 256k;
fastcgi_busy_buffers_size 256k;
fastcgi_temp_file_write_size 256k;
fastcgi_intercept_errors on;
fastcgi_param SCRIPT_FILENAME $document_root$fastcgi_script_name;
}
location /nginx_status {
stub_status on;
access_log off;
allow 127.0.0.1;
allow 35.201.197.211;
deny all;
}
location /php_status {
fastcgi_pass 127.0.0.1:9000;
fastcgi_index index.php;
fastcgi_param SCRIPT_FILENAME $document_root$fastcgi_script_name;
include /etc/nginx/fastcgi_params;
allow 127.0.0.1;
allow 35.201.197.211;
deny all;
}
# Disable .htaccess and other hidden files
location ~ /\.(?!well-known).* {
deny all;
access_log off;
log_not_found off;
}
location = /favicon.ico {
log_not_found off;
access_log off;
}
location = /robots.txt {
allow all;
log_not_found off;
access_log off;
}
location ~* \.(3gp|gif|jpg|jpeg|png|ico|wmv|avi|asf|asx|mpg|mpeg|mp4|pls|mp3|mid|wav|swf|flv|exe|zip|tar|rar|gz|tgz|bz2|uha|7z|doc|docx|xls|xlsx|pdf|iso|eot|svg|ttf|woff)$ {
gzip_static off;
add_header Pragma public;
add_header Cache-Control “public, must-revalidate, proxy-revalidate”;
access_log off;
expires 30d;
break;
}
location ~* \.(txt|js|css)$ {
add_header Pragma public;
add_header Cache-Control “public, must-revalidate, proxy-revalidate”;
access_log off;
expires 30d;
break;
}
}
server {
listen 8686;
access_log off;
log_not_found off;
error_log /home/thaipro.ws/logs/nginx_error.log;
root /home/thaipro.ws/private_html;
index index.php index.html index.htm;
server_name thaipro.ws;
auth_basic “Restricted”;
auth_basic_user_file /home/thaipro.ws/private_html/hocvps/.htpasswd;
location / {
autoindex on;
try_files $uri $uri/ /index.php;
}
location ~ \.php$ {
fastcgi_split_path_info ^(.+\.php)(/.+)$;
include /etc/nginx/fastcgi_params;
fastcgi_pass 127.0.0.1:9000;
fastcgi_index index.php;
fastcgi_connect_timeout 1000;
fastcgi_send_timeout 1000;
fastcgi_read_timeout 1000;
fastcgi_buffer_size 256k;
fastcgi_buffers 4 256k;
fastcgi_busy_buffers_size 256k;
fastcgi_temp_file_write_size 256k;
fastcgi_intercept_errors on;
fastcgi_param SCRIPT_FILENAME $document_root$fastcgi_script_name;
}
location ~ /\. {
deny all;
}
}
đã fix dc, xóa file x.conf làm lại file mới là dc
tks ad nhiều, bài viết bổ ích
File Nginx Conf trên của bạn mình thấy bình thường nên mình nghi có 2 file cùng quy định như thế
Thì nó báo lỗi này
emerg] “location” directive is not allowed here in /etc/nginx/conf.d/thaipro.ws.conf:48Cho em Hỏi nếu em chạy lệnh bằng tay nó như thế này thì của em có phải bị lỗi không ạ?
[root@Nginx-443 ~]# /opt/letsencrypt/letsencrypt-auto renew –pre-hook “service nginx stop” –post-hook “service nginx start”
Saving debug log to /var/log/letsencrypt/letsencrypt.log
——————————————————————————-
Processing /etc/letsencrypt/renewal/api.mptelecom.com.vn.conf
——————————————————————————-
Cert not yet due for renewal
——————————————————————————-
The following certs are not due for renewal yet:
/etc/letsencrypt/live/api.mptelecom.com.vn/fullchain.pem expires on 2018-07-05 (skipped)
No renewals were attempted.
No hooks were run.
——————————————————————————-
Chưa đến kì hạn nên nó chưa cần thiết phải renew. Bạn cho mình kết quả của
/opt/letsencrypt/letsencrypt-auto certificatesSaving debug log to /var/log/letsencrypt/letsencrypt.log
——————————————————————————-
Found the following certs:
Certificate Name: api.mptelecom.com.vn
Domains: api.mptelecom.com.vn
Expiry Date: 2018-08-18 04:57:41+00:00 (VALID: 87 days)
Certificate Path: /etc/letsencrypt/live/api.mptelecom.com.vn/fullchain.pem
Private Key Path: /etc/letsencrypt/live/api.mptelecom.com.vn/privkey.pem
vậy nếu em sử dụng câu lệnh:
/opt/letsencrypt/letsencrypt-auto renew –pre-hook “service nginx stop” –post-hook “service nginx start”
để làm crontab gia hạn tự động là OK đúng không anh.
Cert còn 87 ngày nên chưa renew được nhé bạn. Chỉ renew khi còn <30 ngày. Còn bạn cứ làm crontab như bài viết hướng dẫn là okie
Xin chào anh admin.
Cho em hỏi đây là lỗi gì ạ:
IMPORTANT NOTES:
– The following errors were reported by the server:
Domain: fpt24.com
Type: unauthorized
Detail: Invalid response from
http://fpt24.com/.well-known/acme-challenge/2TRk01LhqClvoPnXYM5B_1UiHuX0tEczWV2w5RZG1w0:
”
300 Multiple Choices
Multiple C”
To fix these errors, please make sure that your domain name was
entered correctly and the DNS A/AAAA record(s) for that domain
contain(s) the right IP address.
em dùng domain từ 1and1, dùng vps google và cài hocvps scripts.
Thanks Anh
Góp ý xíu:
+ Chuyển listen 80 default_server; thành listen 443 ssl default_server;
Chỗ này nếu dùng ở domain thứ 2 trở đi nó sẽ báo trùng server default.
Uhm bạn. Có lưu ý trong phần đỏ của bài viết đó
Mình cài ssl cho 2 domain trên 1 vps giờ nó bị lỗi nginx: [emerg] a duplicate default server for 0.0.0.0:443 in /etc/nginx/conf.d/domain.com.conf. Ad giúp mình với ạ
Minh fix dc roi. Thanks ad
Uhm bạn. 1 VPS không sử dụng 2 default_server nên chỉ 1 site thiết lập nội dung này thôi
Một số nhà cung cấp hosting bây giờ cũng bắt đầu miễn phí SSL rồi không biết là dùng hàng miễn phí có tốt không nhưng nó phổ biến quá rồi.
Hàng miễn phí thấy Let’s Encrypt cũng là tối ưu nhất rồi. Các nhà cung cấp hosting sử dụng Let’s Encrypt làm SSL miễn phí nhiều
Cấu hình SSL cho parked domain thì làm như thế nào vậy ad?
Bạn tạo Nginx Conf riêng cho parked domain thì cài SSL như bình thường thôi, dùng chứng chỉ của parked domain để cài. Nếu HocVPS thì menu parked domain tạo Nginx Conf riêng cho Parked Domain, chứ không phải cấu hình chung trong file của domain chính
Bạn có thể hiểu tương tự như phần này
https://hocvps.com/kich-hoat-wordpress-multisite/#cau-hinh-nginx-duy-nhat-cho-ca-he-thong-wp-multisite
Mình cài bị lỗi như hình cần giúp đỡ khác phục cảm ơn
https://uphinhnhanh.com/image/zzDJz3
Bạn up lại ảnh nhé, quá bé không thấy gì http://prntscr.com/jb9j7b
Của mình các trường hợp khác ok có trường hợp https://www.tranhtrucchi.vn thì không được. Bạn check giúp mình với.
Truy cập bình thường mà bạn?
Có được đâu bạn. https://www của mình ko vào đc
Được mà, bạn thử bằng trình duyệt khác nhé. tự động redirect về non-www https
Đúng rồi. Mình thử chrome thì được, bị firefox. Vậy ko phải lỗi cấu hình mà do trình duyệt rồi. Cái này có cách nào cho firefox nó nhận nốt ko nhỉ
Bạn clear cache và cookie thôi. Hoặc đợi 1 ngày xem sao
Bạn check giúp mình con này nhé. Cũng https:www. https://www.noithatcuduyphat.com.vn/
Dùng sai chứng chỉ nhé. This server could not prove that it is http://www.noithatcuduyphat.com.vn; its security certificate is from tranhtrucchi.vn.
Bạn sửa Nginx Conf đúng chứng chỉ đi
Bạn xem giúp mình sửa chỗ nào với:
server {
listen 443 ssl;
server_name http://www.noithatcuduyphat.com.vn;
# SSL
ssl_certificate /etc/letsencrypt/live/noithatcuduyphat.com.vn/fullchain.pem;
ssl_certificate_key /etc/letsencrypt/live/noithatcuduyphat.com.vn/privkey.pem;
ssl_protocols TLSv1 TLSv1.1 TLSv1.2;
ssl_prefer_server_ciphers on;
ssl_ciphers EECDH+CHACHA20:EECDH+AES128:RSA+AES128:EECDH+AES256:RSA+AES256:EECDH+3DES:RSA+3DES:!MD5;
rewrite ^(.*) https://noithatcuduyphat.com.vn$1 permanent;
}
server {
listen 80;
server_name noithatcuduyphat.com.vn http://www.noithatcuduyphat.com.vn;
rewrite ^(.*) https://noithatcuduyphat.com.vn$1 permanent;
}
server {
listen 443 ssl;
# access_log off;
access_log /home/noithatcuduyphat.com.vn/logs/access.log;
# error_log off;
error_log /home/noithatcuduyphat.com.vn/logs/error.log;
root /home/noithatcuduyphat.com.vn/public_html;
index index.php index.html index.htm;
server_name noithatcuduyphat.com.vn;
# SSL
ssl_certificate /etc/letsencrypt/live/noithatcuduyphat.com.vn/fullchain.pem;
ssl_certificate_key /etc/letsencrypt/live/noithatcuduyphat.com.vn/privkey.pem;
ssl_protocols TLSv1 TLSv1.1 TLSv1.2;
ssl_prefer_server_ciphers on;
ssl_ciphers EECDH+CHACHA20:EECDH+AES128:RSA+AES128:EECDH+AES256:RSA+AES256:EECDH+3DES:RSA+3DES:!MD5;
# Improve HTTPS performance with session resumption
ssl_session_cache shared:SSL:50m;
ssl_session_timeout 1d;
# DH parameters
ssl_dhparam /etc/nginx/ssl/dhparam.pem;
# Enable HSTS
add_header Strict-Transport-Security “max-age=31536000” always;
# Custom configuration
include /home/noithatcuduyphat.com.vn/public_html/*.conf;
location / {
try_files $uri $uri/ /index.php?$args;
}
location ~ \.php$ {
fastcgi_split_path_info ^(.+\.php)(/.+)$;
include /etc/nginx/fastcgi_params;
fastcgi_pass 127.0.0.1:9000;
fastcgi_index index.php;
fastcgi_pass 127.0.0.1:9000;
fastcgi_index index.php;
fastcgi_connect_timeout 300;
fastcgi_send_timeout 300;
fastcgi_read_timeout 300;
fastcgi_buffer_size 32k;
fastcgi_buffers 8 16k;
fastcgi_busy_buffers_size 32k;
fastcgi_temp_file_write_size 32k;
fastcgi_intercept_errors on;
fastcgi_param SCRIPT_FILENAME /home/noithatcuduyphat.com.vn/public_html$fastcgi_script_name;
}
location ~ /\. {
deny all;
}
location = /favicon.ico {
log_not_found off;
access_log off;
}
location = /robots.txt {
allow all;
log_not_found off;
access_log off;
}
location ~* \.(3gp|gif|jpg|jpeg|png|ico|wmv|avi|asf|asx|mpg|mpeg|mp4|pls|mp3|mid|wav|swf|flv|exe|zip|tar|rar|gz|tgz|bz2|uha|7z|doc|docx|xls|xlsx|pdf|iso|eot|svg|ttf|woff)$ {
gzip_static off;
add_header Pragma public;
add_header Cache-Control “public, must-revalidate, proxy-revalidate”;
access_log off;
expires 30d;
break;
}
location ~* \.(txt|js|css)$ {
add_header Pragma public;
add_header Cache-Control “public, must-revalidate, proxy-revalidate”;
access_log off;
expires 30d;
break;
}
}
Ok rồi đó bạn. Trước mình check thì thấy lỗi này nhưng giờ thì hết rồi
http://prntscr.com/j8tr1r
Hic vẫn bị mà. Bị đúng như ảnh bạn gửi đó
Bạn đổi trình duyệt clear cache để test chưa?
Mình test cả trình duyệt cả đổi máy khác rồi vẫn bị vậy
Mình test vẫn bình thường, xem file chứng chỉ của bạn cũng thấy bình thường nên chịu rồi
http://prntscr.com/jb3t35
Chứng chỉ SSL/TLS không bao gồm tên miền https://www.noithatcuduyphat.com.vn/
Hình như tại bước này do mình thiếu khai báo www
“Tiếp theo bạn nhập tên miền sẽ sử dụng chứng chỉ SSL, rồi nhấn Enter. Bước này bạn chỉ nhập phiên bản non-www và www của 1 domain hoặc subdomain.”
Giờ muốn bổ sung thì làm thế nào nhỉ. Cái www giờ đang nhận về domain chính trên vps. Hướng dẫn chi tiết 1 chút giúp mình nhé.
Bạn issue lại chứng chỉ là nó sẽ tự động cập nhật vào file chứng chỉ cũ nhé
Cám ơn rất nhiều nha, mình làm ok rồi
Help Help. Sau khi e cài SSL cho site chính OK rồi em cài tiếp 1 site nữa. Giờ ko khởi đc được nginx nó toàn báo “[emerg] a duplicate default server for 0.0.0.0:443 in /etc/nginx/conf.d/site-cua-ban.com.conf:20”
Ái chỉ cách khắc phục với. Cảm ơn ạ
E đã khắc phục được bằng cách xóa domain mới cài rồi, 🙂
Sau khi xóa đi cài lại thì lại bị dính @@
Bạn đọc chú ý bôi đỏ trong bài viết nhé, phần dành cho domain không phải domain chính trong HocVPS
Cảm ơn Admin. Đã sửa ok
bạn cài ssl cho mình được không? không rành về vps
Nếu không nắm vững kiến thức kỹ thuật, bạn có thể liên hệ sử dụng Dịch vụ Cài đặt SSL từ Học VPS.
https://hocvps.com/dich-vu-ssl/
Bạn ơi. Mình cài ssl thành công cho website rồi, giờ mình muốn khi kích hoạt cloudflare nó vẫn chạy được ssl thì phải làm thế nào ạ?
Bạn làm như phần hướng dẫn đỏ trong bài viết đó, SSL Full Strict
hihi được rồi. Cảm ơn bạn nhiều
Mình đang bị lỗi với magento 1.9
Thông báo chuyển hướng quá nhiều lần và ko truy cập được website
Bạn nào có cách khách phục không giúp mình với
1. Trước khi cấu hình SSL bạn có cài đặt HTTPS gì trên Magento không? Vì Magento lúc build có 1 lựa chọn là HTTPS
2. Trước khi cấu hình SSL site bạn là non-www hay www
3. Bạn có sử dụng Cloudflare đám mây vàng không?
Mình fix được rồi
1. Lúc build mình chọn http
2. Mình dùng non-www
3. Mình ko dùng cloudflare
Đây là file .conf của mình
server {
listen 443 ssl http2;
server_name http://www.vinaukpharma.vn;
# SSL
ssl_certificate /etc/letsencrypt/live/vinaukpharma.vn/fullchain.pem;
ssl_certificate_key /etc/letsencrypt/live/vinaukpharma.vn/privkey.pem;
ssl_protocols TLSv1 TLSv1.1 TLSv1.2;
ssl_prefer_server_ciphers on;
ssl_ciphers EECDH+CHACHA20:EECDH+AES128:RSA+AES128:EECDH+AES256:RSA+AES256:EECDH+3DES:RSA+3DES:!MD5;
rewrite ^(.*) http://vinaukpharma.vn$1 permanent;
}
server {
listen 80;
server_name vinaukpharma.vn http://www.vinaukpharma.vn;
rewrite ^(.*) http://vinaukpharma.vn$1 permanent;
}
server {
#listen 80 default_server;
listen 443 ssl http2 default_server;
# access_log off;
access_log /home/vinaukpharma.vn/logs/access.log;
# error_log off;
error_log /home/vinaukpharma.vn/logs/error.log;
root /home/vinaukpharma.vn/public_html;
index index.php index.html index.htm;
server_name vinaukpharma.vn;
# SSL
ssl_certificate /etc/letsencrypt/live/vinaukpharma.vn/fullchain.pem;
ssl_certificate_key /etc/letsencrypt/live/vinaukpharma.vn/privkey.pem;
ssl_protocols TLSv1 TLSv1.1 TLSv1.2;
ssl_prefer_server_ciphers on;
ssl_ciphers EECDH+CHACHA20:EECDH+AES128:RSA+AES128:EECDH+AES256:RSA+AES256:EECDH+3DES:RSA+3DES:!MD5;
# Improve HTTPS performance with session resumption
ssl_session_cache shared:SSL:50m;
ssl_session_timeout 1d;
# DH parameters
ssl_dhparam /etc/nginx/ssl/dhparam.pem;
# Enable HSTS
add_header Strict-Transport-Security “max-age=31536000” always;
location / {
try_files $uri $uri/ /index.php?$args;
}
# Custom configuration
include /home/vinaukpharma.vn/public_html/*.conf;
location ~ \.php$ {
fastcgi_split_path_info ^(.+\.php)(/.+)$;
include /etc/nginx/fastcgi_params;
fastcgi_pass 127.0.0.1:9000;
fastcgi_index index.php;
fastcgi_connect_timeout 1000;
fastcgi_send_timeout 1000;
fastcgi_read_timeout 1000;
fastcgi_buffer_size 256k;
fastcgi_buffers 4 256k;
fastcgi_busy_buffers_size 256k;
fastcgi_temp_file_write_size 256k;
fastcgi_intercept_errors on;
fastcgi_param SCRIPT_FILENAME $document_root$fastcgi_script_name;
}
location /nginx_status {
stub_status on;
access_log off;
allow 127.0.0.1;
deny all;
}
location /php_status {
fastcgi_pass 127.0.0.1:9000;
fastcgi_index index.php;
fastcgi_param SCRIPT_FILENAME $document_root$fastcgi_script_name;
include /etc/nginx/fastcgi_params;
allow 127.0.0.1;
allow 103.216.115.103;
deny all;
}
# Disable .htaccess and other hidden files
location ~ /\.(?!well-known).* {
deny all;
access_log off;
log_not_found off;
}
location = /favicon.ico {
log_not_found off;
access_log off;
}
location = /robots.txt {
allow all;
log_not_found off;
access_log off;
}
location ~* \.(3gp|gif|jpg|jpeg|png|ico|wmv|avi|asf|asx|mpg|mpeg|mp4|pls|mp3|mid|wav|swf|flv|exe|zip|tar|rar|gz|tgz|bz2|uha|7z|doc|docx|xls|xlsx|pdf|iso|eot|svg|ttf|woff)$ {
gzip_static off;
add_header Pragma public;
add_header Cache-Control “public, must-revalidate, proxy-revalidate”;
access_log off;
expires 30d;
break;
}
location ~* \.(txt|js|css)$ {
add_header Pragma public;
add_header Cache-Control “public, must-revalidate, proxy-revalidate”;
access_log off;
expires 30d;
break;
}
}
Bạn rewrite sai rồi kìa
rewrite ^(.*) http://vinaukpharma.vn$1 permanent;. Viết thế HTTP redirect về chính HTTP nên bị vòng lặpChỉ truy cập được duy nhất HTTPS của non-www
Đúng là
rewrite ^(.*) https://vinaukpharma.vn$1 permanent;.Hi, cảm ơn bạn Mod nhé
Sau khi cài SSL mình không thể đăng nhập được wp-admin nữa. Bấm vào nó cứ load xong lại hiện khung đăng nhập. Không báo gì hết.
Đây là file cấu hình ssl của mình:
server {
listen 443 ssl;
server_name http://www.phata.edu.vn;
# SSL
ssl_certificate /etc/letsencrypt/live/phata.edu.vn/fullchain.pem;
ssl_certificate_key /etc/letsencrypt/live/phata.edu.vn/privkey.pem;
ssl_protocols TLSv1 TLSv1.1 TLSv1.2;
ssl_prefer_server_ciphers on;
ssl_ciphers EECDH+CHACHA20:EECDH+AES128:RSA+AES128:EECDH+AES256:RSA+AES256:EECDH+3DES:RSA+3DES:!MD5;
rewrite ^(.*) https://phata.edu.vn$1 permanent;
}
server {
listen 80;
server_name phata.edu.vn http://www.phata.edu.vn;
rewrite ^(.*) https://phata.edu.vn$1 permanent;
}
server {
listen 443 ssl;
# access_log off;
access_log /home/phata.edu.vn/logs/access.log;
# error_log off;
error_log /home/phata.edu.vn/logs/error.log;
root /home/phata.edu.vn/public_html;
index index.php index.html index.htm;
server_name phata.edu.vn;
# SSL
ssl_certificate /etc/letsencrypt/live/phata.edu.vn/fullchain.pem;
ssl_certificate_key /etc/letsencrypt/live/phata.edu.vn/privkey.pem;
ssl_protocols TLSv1 TLSv1.1 TLSv1.2;
ssl_prefer_server_ciphers on;
ssl_ciphers EECDH+CHACHA20:EECDH+AES128:RSA+AES128:EECDH+AES256:RSA+AES256:EECDH+3DES:RSA+3DES:!MD5;
# Improve HTTPS performance with session resumption
ssl_session_cache shared:SSL:50m;
ssl_session_timeout 1d;
# DH parameters
ssl_dhparam /etc/nginx/ssl/dhparam.pem;
# Enable HSTS
add_header Strict-Transport-Security “max-age=31536000” always;
location / {
try_files $uri $uri/ /index.php?$args;
}
# Custom configuration
include /home/phata.edu.vn/public_html/*.conf;
location ~ \.php$ {
fastcgi_split_path_info ^(.+\.php)(/.+)$;
include /etc/nginx/fastcgi_params;
fastcgi_pass 127.0.0.1:9000;
fastcgi_index index.php;
fastcgi_connect_timeout 300;
fastcgi_send_timeout 300;
fastcgi_read_timeout 300;
fastcgi_buffer_size 32k;
fastcgi_buffers 8 16k;
fastcgi_busy_buffers_size 32k;
fastcgi_temp_file_write_size 32k;
fastcgi_intercept_errors on;
fastcgi_param SCRIPT_FILENAME /home/phata.edu.vn/public_html$fastcgi_script_name;
}
location ~ /\. {
deny all;
}
location = /favicon.ico {
log_not_found off;
access_log off;
}
location = /robots.txt {
allow all;
log_not_found off;
access_log off;
}
location ~* \.(3gp|gif|jpg|jpeg|png|ico|wmv|avi|asf|asx|mpg|mpeg|mp4|pls|mp3|mid|wav|swf|flv|exe|zip|tar|rar|gz|tgz|bz2|uha|7z|doc|docx|xls|xlsx|pdf|iso|eot|svg|ttf|woff)$ {
gzip_static off;
add_header Pragma public;
add_header Cache-Control “public, must-revalidate, proxy-revalidate”;
access_log off;
expires 30d;
break;
}
location ~* \.(txt|js|css)$ {
add_header Pragma public;
add_header Cache-Control “public, must-revalidate, proxy-revalidate”;
access_log off;
expires 30d;
break;
}
}
Hiện tại site bạn không thể connect không riêng gì wp-admin. Bạn kiểm tra service Nginx nhé
Mình đã xoá luôn ssl, resstore lai .conf nhưng vẫn không vào được admin
server {
listen 80;
server_name http://www.phata.edu.vn;
rewrite ^(.*) http://phata.edu.vn$1 permanent;
}
server {
listen 80;
# access_log off;
access_log /home/phata.edu.vn/logs/access.log;
# error_log off;
error_log /home/phata.edu.vn/logs/error.log;
root /home/phata.edu.vn/public_html;
index index.php index.html index.htm;
server_name phata.edu.vn;
location / {
try_files $uri $uri/ /index.php?$args;
}
# Custom configuration
include /home/phata.edu.vn/public_html/*.conf;
location ~ \.php$ {
fastcgi_split_path_info ^(.+\.php)(/.+)$;
include /etc/nginx/fastcgi_params;
fastcgi_pass 127.0.0.1:9000;
fastcgi_index index.php;
fastcgi_connect_timeout 300;
fastcgi_send_timeout 300;
fastcgi_read_timeout 300;
fastcgi_buffer_size 32k;
fastcgi_buffers 8 16k;
fastcgi_busy_buffers_size 32k;
fastcgi_temp_file_write_size 32k;
fastcgi_intercept_errors on;
fastcgi_param SCRIPT_FILENAME /home/phata.edu.vn/public_html$fastcgi_script_name;
}
location ~ /\. {
deny all;
}
location = /favicon.ico {
log_not_found off;
access_log off;
}
location = /robots.txt {
allow all;
log_not_found off;
access_log off;
}
location ~* \.(3gp|gif|jpg|jpeg|png|ico|wmv|avi|asf|asx|mpg|mpeg|mp4|pls|mp3|mid|wav|swf|flv|exe|zip|tar|rar|gz|tgz|bz2|uha|7z|doc|docx|xls|xlsx|pdf|iso|eot|svg|ttf|woff)$ {
gzip_static off;
add_header Pragma public;
add_header Cache-Control “public, must-revalidate, proxy-revalidate”;
access_log off;
expires 30d;
break;
}
location ~* \.(txt|js|css)$ {
add_header Pragma public;
add_header Cache-Control “public, must-revalidate, proxy-revalidate”;
access_log off;
expires 30d;
break;
}
}
Bạn restart lại Nginx để nhận cấu hình cũ đi. Rồi kiểm tra nginx -t
Mình check thấy bình thường rồi đó
Mình mò sáng giờ. Lỗi phân quyền gì đó bạn. Lúc mình cài ssl thì nó báo không có quyền lưu session xong mình chạy lênh:
chown nginx:nginx /var/lib/php/session
Sau đó là lỗi vậy luôn: [Can’t create/write to file ‘/tmp/#sql_25cb_0.MAI’ (Errcode: 13)]
Mình mới phân quyền lại bằng lệnh này nữa thì vào được:
chmod 1777 /tmp
Bạn kiểm tra hệ thống còn nhiều dung lượng trống không?
df -ah
Chào anh Luân và anh Phương, em có cấu hình để tự động gia hạn chứng chỉ SSL như hướng dẫn ở trên. Tuy nhiên trong file cấu hình crontab, em có thêm 1 dòng để tự động backup dữ liệu web. Nội dung file crontab như sau: https://pastebin.com/wG3kaHB7
Em muốn hỏi nội dung trong file em ghi như vậy đã đúng chưa. Vì em bị lỗi không gia hạn được chứng chỉ SSL. Cảm ơn 2 anh.
Đúng rồi. Bạn kiểm tra log xem vì sao /var/log/le-renew.log
Đồng thời gia hạn tự động có kết quả như thế nào
Em đã xóa chứng chỉ cũ để cài lại chứng chỉ mới rồi nên không xem lại log được. Để lần sau em kiểm tra lại xem sao :D. Cảm ơn anh đã hỗ trợ
Còn trống nhiều
Filesystem Size Used Avail Use% Mounted on
/dev/vda1 20G 4.2G 15G 23% /
proc 0 0 0 – /proc
sysfs 0 0 0 – /sys
devpts 0 0 0 – /dev/pts
tmpfs 250M 0 250M 0% /dev/shm
none 0 0 0 – /proc/sys/fs/binfmt_misc
Ok bạn, thế lỗi [Can’t create/write to file ‘/tmp/#sql_25cb_0.MAI’ (Errcode: 13)] kia không liên quan đến dung lượng. Bạn phân quyền xong hệ thống ok rồi chứ
Đã ok rồi bạn.
Hôm trước VPS khác mình cũng bị y chang lỗi này.
Lỗi do sau khi cài ssl trên họcvps theo hướng dẫn này.
Giờ muốn cấu hình port cài HocVPS về mặc định ban đầu thì mình chỉ việc bỏ đi những dòng đỏ trong block server có listen 2018 mà ad hướng dẫn thôi phải không ad? (Tại chót dùng Cloudflare mà không đọc kĩ hướng dẫn sử dụng trước khi dùng)
Không, mà bạn phải sửa lại về ban đầu. Vì nhiều dòng đỏ là sửa ban đầu chứ không phải chèn thêm vào
Hồi đầu cài Let’s mình không có back up những file conf. Giờ xóa Let’s đi thì những file conf muốn trở về mặc định ban đầu như “chưa hề có cuộc” cài Let’s thì như nào bây giờ mod Việt Phương ơi?. Tại chuyển nhà qua xài hết Cloudflare. Mong mod giúp với, không hoang mang quá!
Bạn có thể dùng hocvps menu thêm 1 domain mới, abczyx gì đó rồi tham khảo từ Nginx Conf của domain đó.
Xong thì xóa domain zbcxyz đó đi
1. Ad cho mình hỏi sự khác nhau giữa cài Let’s Encrypt trên server như bài và dùng ssl của Cloudflare là gì vậy? Tại thấy Cloudflare cũng có dịch vụ ssl luôn rồi, vậy có nên cài tiếp Let’s Encrypt trên server nữa không?
2. Từ lúc mình dùng Cloudflare check thì thấy chứng chỉ ssl đang là của Cloudflare (hết hạn trong 180 ngày) không phải của Let’s Encrypt (90 ngày) nữa. Vậy thì cài Let’s Encrypt là vô nghĩa à ad? Mong ad giải thích giúp với ạ! Tks!
1. Tùy trình duyệt hỗ trợ mỗi bên, bạn tự trải nghiệm nhé. Hàng free sẽ có giới hạn về trình duyệt phiên bản cũ, ví dụ WinXP và không có bảo hiểm
2. Bạn dùng Nameserver CF và chứng chỉ CF thì không cần dùng Let’s Encrypt nữa nhé
Chào Luân, mình đã cài đặt web bằng hocvps và chứng chỉ ssl nhưng hôm nay vào web lại bị thông báo như thế này
DNS Lookup for “dunglendi.com” failed. System.Net.Sockets.SocketException This is usually a temporary error during hostname resolution and means that the local server did not receive a response from an authoritative server
Mình kiểm tra thì domain vẫn trỏ bình thường chứ ko thay đổi gì, admin giúp mình với
1. No Record Found : https://who.is/dns/dunglendi.com
2. Không thể ping
# ping dunglendi.com
Ping request could not find host dunglendi.com. Please check the name and try again.
Bạn kiểm tra lại DNS của Domain nhé
mình dùng vultr thì add NS record như thế nào vậy VIệt Phương ơi
Record bạn quản lý của nhà cung cấp domain, cần gì phải qua VPS
ok bạn mình đã fix đc lỗi
Hi,
Hôm nay mình quay lại topic này và tiếp tục cài ssl như trc đây và mình gặp lỗi này:
“nginx- duplicate default server error”. Fix làm sao vậy bạn
Bạn có nhiều hơn 1
default_servertrong toàn bộ cấu hình Nginx. Phần chú ý đỏ mình có lưu ý nhée có cài giống với hướng dẫn trên với trang web wordpress của e nhưng hiện tại sau khi cài theo các bước trên thì e bị chặn.. báo là trang web đã chuyển hướng quá nhiều lần.. e đang gặp rắc rối về phần này.. mong được sự chỉ dẫn từ anh sớm nhất có thể !
Cái này do nhiều vấn đề lắm.
1. Kiểm tra lại Nginx Conf.
2. Kiểm tra đã tắt đám mây vàng Cloudflare
3. Kiểm tra database đã chuyển siteurl sang https chưa
4. Kiểm tra đã tắt toàn bộ các plugin ssl, ví dụ itheme security… Tốt nhất là đổi tên toàn bộ thư mục plugin rồi restart lại webserver xem site bthg không
Admin ơi, mình cài thêm web con trên vps và sử dụng Encrypt tạo Https cho trang đó. Nhưng giờ truy cập vào tên miền con nó toàn tự bay sang trang mẹ, Cái này thì khắc phục ntn admin ơi
Trang con là ohbonus.com
Mình nghi do cấu hình Nginx. Cho mình kết quả của nginx -t và service nginx status
Đồng thời gửi mình cấu hình Nginx Conf của 2 con. Gửi qua https://pastebin.com/ cho gọn
Hoặc bạn có thể gửi qua support@hocvps.com
đã gửi qua email, admin check mail giùm với
hi,
Mình gặp 1 lỗi khi 1 site mình ko sử dụng ssl nữa trên cùng hệ thống thì nó tự redirect 301 tới 1 site khác trong củng server. Làm sao fix dc vậy bạn
Các link HTTPS của domain đó đã được sinh ra nhưng không được xử lý nên Nginx Webserver sẽ redirect sang default_server của hệ thống. Bạn thêm cấu hình redirect HTTPS về HTTP nếu bạn không sử dụng HTTPS nữa nhé
cho mình xin đoạn mã đó và chổ để điền đoạn mã đó đi bạn, cảm ơn bạn
Bạn tham khảo cmt này nhé: https://hocvps.com/cai-dat-chung-chi-ssl/comment-page-5/#comment-26048
Domain dùng đám mây vàng và full strict ssl của cloudflare ko renew được ad có cách nào fix ko ạ hay phải tắt đám mây đi? Edit file config của nginx để dùng ip:port để truy cập hocvps admin vẫn ko gia hạn được ạ
Không gia hạn được nhé. Vì đám mây vàng đã chiếm cổng 443 để bạn gia hạn SSL rồi. Bắt buộc phải tắt đám mây vàng khi gia hạn
Chào bác Phương!
Em cài ok rồi, nhưng cái phần gia hạn em có cài crontab nhưng không chạy. Em toàn phải gia hạn thủ công.
Em xài hocvps centos 6.8 bản 64 bit của vultr
1. Bạn kiểm tra Log Let Encrypt và Log Crontab
2. Crontab bạn update như trong bài viết rồi đúng không
Mình cài SSL cho 2 domain trên cùng 1 VPS vậy mình lập lệnh gia hạn SSL 2 lần hả Admin?
Không cần bạn nhé. Lệnh gia hạn tự động gia hạn toàn bộ cert trong VPS khi cert đó đạt thời hạn (hạn dùng <30 ngày)
“Cửa hàng của bạn không sử dụng giao thức an toàn HTTPS”
em đã cài thành công https rồi mà sao khi kiểm tra thì vẫn báo lỗi trên
Website bạn là gì? Thông báo hiện ở đâu
Site bạn đang bị lỗi “redirected you too many times.” Còn lỗi thông báo trong woocommer không phải ngoài WP thì mình không rõ rồi. Có thể cần phải thiết lập thêm trong chính woocommer. Bạn dùng Really Simple SSL không chuyển HTTPS hết?
Mình dùng lệnh #yum -y update nss curl
Và đã chạy được lệnh bình thường rồi. Cám ơn bác đã hỗ trợ em!
Ok bạn. Có vẻ hệ thống bạn lâu chưa update. Well noted
Mình dùng lệnh này nó báo lỗi
git clone https://github.com/letsencrypt/letsencrypt /opt/letsencrypt
Initialized empty Git repository in /opt/letsencrypt/.git/
error: while accessing https://github.com/letsencrypt/letsencrypt/info/refs
fatal: HTTP request failed
bạn
curl https://google.comkết quả ntnNó ra 1 hồi code:
https://uphinhnhanh.com/images/2018/03/08/Untitled28217.png
1. Hệ điều hành bạn là gì
2. Cho mình kết quả của
curl https://github.com/letsencrypt/letsencrypt3. Bạn có đang dùng user root có quyền đối với thư mục opt không
ls -al /opt/1. Mình dùng: CentOS 6.7 x32 – Dùng HocVPS
2. Nó ra kết quả: curl: (35) SSL connect error
3. Mình đang dùng root
ls -al /opt/
total 8
drwxr-xr-x 2 root root 4096 Mar 8 04:50 .
dr-xr-xr-x 21 root root 4096 Mar 7 01:12 ..
Bạn cài lại chứng chỉ VPS
# mv /etc/ssl/certs/ca-bundle.crt /etc/ssl/certs/ca-bundle.crt.bak# yum reinstall -y ca-certificates
Rồi chạy lại lệnh git xem được không
Bác ơi em vẫn bị lỗi khi chạy lệnh
[root@Naugido home]# mv /etc/ssl/certs/ca-bundle.crt /etc/ssl/certs/ca-bundle.crt.bak
mv: cannot stat `/etc/ssl/certs/ca-bundle.crt’: No such file or directory
[root@Naugido home]# mv /etc/ssl/certs/ca-bundle.crt /etc/ssl/certs/ca-bundle.crt.bak
mv: cannot stat `/etc/ssl/certs/ca-bundle.crt’: No such file or directory
[root@Naugido home]# yum reinstall -y ca-certificates
Loaded plugins: fastestmirror
Setting up Reinstall Process
Loading mirror speeds from cached hostfile
Could not get metalink https://mirrors.fedoraproject.org/metalink?repo=epel-6&arch=i386 error was
14: PYCURL ERROR 77 – “Problem with the SSL CA cert (path? access rights?)”
* base: centos.usonyx.net
* epel: mirror.nes.co.id
* extras: centos.usonyx.net
* remi: mirrors.thzhost.com
* remi-php56: mirrors.thzhost.com
* remi-safe: mirrors.thzhost.com
* updates: centos.usonyx.net
Installed package ca-certificates-2015.2.6-65.0.1.el6_7.noarch (from updates) not available.
Error: Nothing to do
Và em vào hocvps để nâng cấp thì nó ko nâng cấp được.
https://uphinhnhanh.com/images/2018/03/09/2018-03-09_8-52-47.jpg
1. Nó không liên quan gì đến update PHP-FPM, Nginx hay MySQL cả
2. VPS bạn hiện không thể kết nối qua giao thức HTTPS
Bạn chạy ra kết quả gì
# mv /etc/ssl/certs/ca-bundle.crt.bak /etc/ssl/certs/ca-bundle.crt# yum reinstall -y ca-certificates
# curl https://github.com/letsencrypt/letsencrypt
Mình chạy lệnh nó ra như sau
Last login: Thu Mar 8 20:50:12 2018 from 183.80.31.0
[root@Naugido home]# mv /etc/ssl/certs/ca-bundle.crt.bak /etc/ssl/certs/ca-bundle.crt
[root@Naugido home]# yum reinstall -y ca-certificates
Loaded plugins: fastestmirror
Setting up Reinstall Process
Loading mirror speeds from cached hostfile
epel/metalink | 7.2 kB 00:00
* base: centos.usonyx.net
* epel: mirror.nes.co.id
* extras: centos.usonyx.net
* remi: mirrors.thzhost.com
* remi-php56: mirrors.thzhost.com
* remi-safe: mirrors.thzhost.com
* updates: centos.usonyx.net
Installed package ca-certificates-2015.2.6-65.0.1.el6_7.noarch (from updates) not available.
Error: Nothing to do
[root@Naugido home]# curl https://github.com/letsencrypt/letsencrypt
curl: (35) SSL connect error
[root@Naugido home]#
Bạn update hệ thống đi xem giải quyết vấn đề không. Mình nghĩ package NSS cũ quá
# yum -y update nss curlrồi chạy# curl https://github.com/letsencrypt/letsencryptNếu vẫn không được thì
# yum -y update# curl https://github.com/letsencrypt/letsencrypt
Mình cài và gia hạn cho subdomain enmt.fususu.com, tháng trước vẫn bình thường, song hôm nay vào tự nhiên nó báo lỗi NET::ERR_CERT_COMMON_NAME_INVALID – ko vào dc.
Check SSL thi ra lỗi common gì đó. Chữa kiểu gì các bạn nhỉ?
https://www.sslshopper.com/ssl-checker.html#hostname=enmt.fususu.com
Theo mình thấy thì cert bạn issue cho mt.fususu chứ không phải enmt.fususu
Và cái cert đang cài cho enmt cũng không phải cho enmt mà cho mt. Bạn kiểm tra lại nginx conf và cert issue xem
Oh chuẩn rồi! CHắc mình config nhầm mà ko để ý :> cám ơn hocvps nha! luôn tin dùng hocvps! chúc năm mới sung sướng!
Em đã cài đặt thành công cho domain chính. Hnay muốn thêm domain chạy lại code thì báo lỗi như sau:
An unexpected error occurred:
The request message was malformed :: Error creating new authz :: Invalid character in DNS name
Em có chạy thử lại thì báo tiếp:
An unexpected error occurred:
ConnectionError: HTTPSConnectionPool(host=’acme-v01.api.letsencrypt.org’, port=443): Max retries exceeded with url: /directory (Caused by NewConnectionError(‘: Failed to establish a new connection: [Errno -2] Name or service not known’,))
Please see the logfiles in /var/log/letsencrypt for more details.
Nhờ anh hỗ trợ lỗi này sửa như thế nào ạ. Cám ơn anh
Bạn gõ domain có kí tự không cho phép nên báo Invalid character. Bạn issue cho những domain nào?
Ngoài ra, do ngày hum nay bạn đã thử quá nhiều nên chặn issue cert trong ngày.
Hello Admin!
Cho minh hỏi vậy làm thế nào để removed Let’s Encrypt khỏi hocvps vậy ah!
Xin cám ơn
Bạn xóa /etc/letsencrypt/ và /opt/letsencrypt là okie
Mình gia hạn SSL thì gặp lỗi này bạn ơi..giúp mình với ak
# /opt/letsencrypt/letsencrypt-auto renew –pre-hook “service nginx stop” –post-hook “service nginx start”
Bootstrapping dependencies for RedHat-based OSes that will use Python3… (you can skip this with –no-bootstrap)
yum is /usr/bin/yum
yum is hashed (/usr/bin/yum)
Loaded plugins: fastestmirror, presto
Setting up Install Process
Loading mirror speeds from cached hostfile
* epel: fr.mirror.babylon.network
* remi: fr.mirror.babylon.network
* remi-php56: fr.mirror.babylon.network
* remi-safe: fr.mirror.babylon.network
Package gcc-4.4.7-18.el6.x86_64 already installed and latest version
Package augeas-libs-1.0.0-10.el6.x86_64 already installed and latest version
Package libffi-devel-3.0.5-3.2.el6.x86_64 already installed and latest version
Package redhat-rpm-config-9.0.3-51.el6.centos.noarch already installed and latest version
Resolving Dependencies
–> Running transaction check
—> Package ca-certificates.noarch 0:2015.2.6-65.0.1.el6_7 will be updated
—> Package ca-certificates.noarch 0:2017.2.14-65.0.1.el6_9 will be an update
—> Package openssl.x86_64 0:1.0.1e-48.el6_8.3 will be updated
—> Package openssl.x86_64 0:1.0.1e-57.el6 will be an update
—> Package openssl-devel.x86_64 0:1.0.1e-48.el6_8.3 will be updated
—> Package openssl-devel.x86_64 0:1.0.1e-57.el6 will be an update
—> Package python34.x86_64 0:3.4.5-4.el6 will be installed
–> Processing Dependency: python34-libs(x86-64) = 3.4.5-4.el6 for package: python34-3.4.5-4.el6.x86_64
–> Processing Dependency: libpython3.4m.so.1.0()(64bit) for package: python34-3.4.5-4.el6.x86_64
—> Package python34-devel.x86_64 0:3.4.5-4.el6 will be installed
–> Processing Dependency: python-rpm-macros for package: python34-devel-3.4.5-4.el6.x86_64
–> Processing Dependency: python3-rpm-macros for package: python34-devel-3.4.5-4.el6.x86_64
—> Package python34-tools.x86_64 0:3.4.5-4.el6 will be installed
–> Processing Dependency: python34-tkinter = 3.4.5-4.el6 for package: python34-tools-3.4.5-4.el6.x86_64
–> Running transaction check
—> Package python-rpm-macros.noarch 0:3-11.el6 will be installed
–> Processing Dependency: python-srpm-macros for package: python-rpm-macros-3-11.el6.noarch
—> Package python3-rpm-macros.noarch 0:3-11.el6 will be installed
—> Package python34-libs.x86_64 0:3.4.5-4.el6 will be installed
—> Package python34-tkinter.x86_64 0:3.4.5-4.el6 will be installed
–> Running transaction check
—> Package python-srpm-macros.noarch 0:3-11.el6 will be installed
–> Finished Dependency Resolution
Error: Multilib version problems found. This often means that the root
cause is something else and multilib version checking is just
pointing out that there is a problem. Eg.:
1. You have an upgrade for openssl which is missing some
dependency that another package requires. Yum is trying to
solve this by installing an older version of openssl of the
different architecture. If you exclude the bad architecture
yum will tell you what the root cause is (which package
requires what). You can try redoing the upgrade with
–exclude openssl.otherarch … this should give you an error
message showing the root cause of the problem.
2. You have multiple architectures of openssl installed, but
yum can only see an upgrade for one of those arcitectures.
If you don’t want/need both architectures anymore then you
can remove the one with the missing update and everything
will work.
3. You have duplicate versions of openssl installed already.
You can use “yum check” to get yum show these errors.
…you can also use –setopt=protected_multilib=false to remove
this checking, however this is almost never the correct thing to
do as something else is very likely to go wrong (often causing
much more problems).
Protected multilib versions: openssl-1.0.1e-57.el6.x86_64 != openssl-1.0.1e-48.el6_8.3.i686
Could not install OS dependencies. Aborting bootstrap!
Bạn chạy
yum updatehoặcyum update opensslrồi chạy lại lệnh renew certmình có chạy yum update và yum update opensl rồi và chạy lại lệnh gia hạn renwew cert rồi những vẫn bị lỗi và nhận thông báo như sau..Bạn giúp mình với mình có rát nhiều website quan trọng trong vps này
# /opt/letsencrypt/letsencrypt-auto renew –pre-hook “service nginx stop” –post-hook “service nginx start”
Bootstrapping dependencies for RedHat-based OSes that will use Python3… (you can skip this with –no-bootstrap)
yum is /usr/bin/yum
yum is hashed (/usr/bin/yum)
Loaded plugins: fastestmirror, presto
Setting up Install Process
Loading mirror speeds from cached hostfile
Could not get metalink https://mirrors.fedoraproject.org/metalink?repo=epel-6&arch=x86_64 error was

14: PYCURL ERROR 77 – “Problem with the SSL CA cert (path? access rights?)”
* epel: mirrors.mit.edu
* remi: mirror.team-cymru.org
* remi-php71: mirror.team-cymru.org
* remi-safe: mirror.team-cymru.org
Package gcc-4.4.7-18.el6.x86_64 already installed and latest version
Package augeas-libs-1.0.0-10.el6.x86_64 already installed and latest version
Package openssl-1.0.1e-57.el6.x86_64 already installed and latest version
Package openssl-devel-1.0.1e-57.el6.x86_64 already installed and latest version
Package libffi-devel-3.0.5-3.2.el6.x86_64 already installed and latest version
Package redhat-rpm-config-9.0.3-51.el6.centos.noarch already installed and latest version
Package ca-certificates-2017.2.14-65.0.1.el6_9.noarch already installed and latest version
Package python34-3.4.5-2.el6.x86_64 already installed and latest version
Package python34-devel-3.4.5-2.el6.x86_64 already installed and latest version
Package python34-tools-3.4.5-2.el6.x86_64 already installed and latest version
Nothing to do
WARNING: unable to check for updates.
Creating virtual environment…
Installing Python packages…
Traceback (most recent call last):
File “/usr/lib64/python3.4/urllib/request.py”, line 1183, in do_open
h.request(req.get_method(), req.selector, req.data, headers)
File “/usr/lib64/python3.4/http/client.py”, line 1137, in request
self._send_request(method, url, body, headers)
File “/usr/lib64/python3.4/http/client.py”, line 1182, in _send_request
self.endheaders(body)
File “/usr/lib64/python3.4/http/client.py”, line 1133, in endheaders
self._send_output(message_body)
File “/usr/lib64/python3.4/http/client.py”, line 963, in _send_output
self.send(msg)
File “/usr/lib64/python3.4/http/client.py”, line 898, in send
self.connect()
File “/usr/lib64/python3.4/http/client.py”, line 1287, in connect
server_hostname=server_hostname)
File “/usr/lib64/python3.4/ssl.py”, line 362, in wrap_socket
_context=self)
File “/usr/lib64/python3.4/ssl.py”, line 580, in __init__
self.do_handshake()
File “/usr/lib64/python3.4/ssl.py”, line 807, in do_handshake
self._sslobj.do_handshake()
ssl.SSLError: [SSL: CERTIFICATE_VERIFY_FAILED] certificate verify failed (_ssl.c:600)
During handling of the above exception, another exception occurred:
Traceback (most recent call last):
File “/tmp/tmp.rPIj4upFMw/pipstrap.py”, line 165, in
exit(main())
File “/tmp/tmp.rPIj4upFMw/pipstrap.py”, line 146, in main
for url, digest in PACKAGES]
File “/tmp/tmp.rPIj4upFMw/pipstrap.py”, line 146, in
for url, digest in PACKAGES]
File “/tmp/tmp.rPIj4upFMw/pipstrap.py”, line 121, in hashed_download
response = opener().open(url)
File “/usr/lib64/python3.4/urllib/request.py”, line 464, in open
response = self._open(req, data)
File “/usr/lib64/python3.4/urllib/request.py”, line 482, in _open
‘_open’, req)
File “/usr/lib64/python3.4/urllib/request.py”, line 442, in _call_chain
result = func(*args)
File “/usr/lib64/python3.4/urllib/request.py”, line 1226, in https_open
context=self._context, check_hostname=self._check_hostname)
File “/usr/lib64/python3.4/urllib/request.py”, line 1185, in do_open
raise URLError(err)
urllib.error.URLError:
Kết quả 2 lệnh chạy kia ntn?
Đây bạn bạn giúp mình với!
# yum update
Loaded plugins: fastestmirror, presto
Setting up Update Process
Loading mirror speeds from cached hostfile
Could not get metalink https://mirrors.fedoraproject.org/metalink?repo=epel-6&arch=x86_64 error was
14: PYCURL ERROR 77 – “Problem with the SSL CA cert (path? access rights?)”
* epel: mirrors.mit.edu
* remi: mirror.team-cymru.org
* remi-php71: mirror.team-cymru.org
* remi-safe: mirror.team-cymru.org
No Packages marked for Update
[root@vps105060 home]# yum update openssl
Loaded plugins: fastestmirror, presto
Setting up Update Process
Loading mirror speeds from cached hostfile
Could not get metalink https://mirrors.fedoraproject.org/metalink?repo=epel-6&arch=x86_64 error was
14: PYCURL ERROR 77 – “Problem with the SSL CA cert (path? access rights?)”
* epel: mirrors.mit.edu
* remi: mirror.team-cymru.org
* remi-php71: mirror.team-cymru.org
* remi-safe: mirror.team-cymru.org
No Packages marked for Update
Vấn đề thuộc hệ thống SSL trong VPS bạn
Could not get metalink https://mirrors.fedoraproject.org/metalink?repo=epel-6&arch=x86_64 error was14: PYCURL ERROR 77 – “Problem with the SSL CA cert (path? access rights?)”
Bạn chạy
# yum clean allrồi chạy lại lệnh renew xem# yum --disablerepo="epel" update nss
Ngoài ra, bạn có cài Varnish trong hệ thống không?
Bạn ơi mình đã làm như bạn và khi renew cert thì nhận đc thông báo ntn bạn giúp mình với ak
# /opt/letsencrypt/letsencrypt-auto renew –pre-hook “service nginx stop” –post-hook “service nginx start”
Bootstrapping dependencies for RedHat-based OSes that will use Python3… (you can skip this with –no-bootstrap)
yum is /usr/bin/yum
To use Certbot, packages from the EPEL repository need to be installed.
Enable the EPEL repository and try running Certbot again.
Bạn chạy
yum -y install epel-releaserồi renew cert được khôngMình chạy lệnh và báo lỗi này bạn ak..Bạn giúp mình vs
# yum -y install epel-release
Loaded plugins: fastestmirror, presto
Setting up Install Process
Loading mirror speeds from cached hostfile
Error: Cannot retrieve metalink for repository: epel. Please verify its path and try again
[root@vps105060 home]# /opt/letsencrypt/letsencrypt-auto renew –pre-hook “service nginx stop” –post-hook “service nginx start”
Bootstrapping dependencies for RedHat-based OSes that will use Python3… (you can skip this with –no-bootstrap)
yum is /usr/bin/yum
To use Certbot, packages from the EPEL repository need to be installed.
Enable the EPEL repository and try running Certbot again.
Error: Cannot retrieve metalink for repository: epel. Please verify its path and try againCài không thành công. Cho mình nội dung của
nano /etc/yum.repos.d/epel.repoĐây bạn ak
GNU nano 2.0.9 File: /etc/yum.repos.d/epel.repo
[epel]
name=Extra Packages for Enterprise Linux 6 – $basearch
#baseurl=http://download.fedoraproject.org/pub/epel/6/$basearch
mirrorlist=https://mirrors.fedoraproject.org/metalink?repo=epel-6&arch=$basearch
failovermethod=priority
enabled=1
gpgcheck=1
gpgkey=file:///etc/pki/rpm-gpg/RPM-GPG-KEY-EPEL-6
[epel-debuginfo]
name=Extra Packages for Enterprise Linux 6 – $basearch – Debug
#baseurl=http://download.fedoraproject.org/pub/epel/6/$basearch/debug
mirrorlist=https://mirrors.fedoraproject.org/metalink?repo=epel-debug-6&arch=$basearch
failovermethod=priority
enabled=0
gpgkey=file:///etc/pki/rpm-gpg/RPM-GPG-KEY-EPEL-6
gpgcheck=1
[epel-source]
name=Extra Packages for Enterprise Linux 6 – $basearch – Source
#baseurl=http://download.fedoraproject.org/pub/epel/6/SRPMS
mirrorlist=https://mirrors.fedoraproject.org/metalink?repo=epel-source-6&arch=$basearch
failovermethod=priority
enabled=0
Bạn thêm mình kết quả của
yum repolistnữaĐây bạn ak. Giúp mình vs ak
# yum repolist
Loaded plugins: fastestmirror, presto
Loading mirror speeds from cached hostfile
Error: Cannot retrieve metalink for repository: epel. Please verify its path and try again
Trong file
/etc/yum.repos.d/epel.repobạn vừa post ý, bạn sửa url của metalink thành http điVí dụ
mirrorlist=http://mirrors.fedoraproject.org/metalink?repo=epel-6&arch=$basearchRồi chạy lạiMình đã sửa hết https thành http rồi và chạy lại lệnh renew thì vẫn nhận báo lỗi ntn bạn ak..
Bạn giúp mình vs 🙁
# /opt/letsencrypt/letsencrypt-auto renew –pre-hook “service nginx stop” –post-hook “service nginx start”
Bootstrapping dependencies for RedHat-based OSes that will use Python3… (you can skip this with –no-bootstrap)
yum is /usr/bin/yum
yum is hashed (/usr/bin/yum)
Loaded plugins: fastestmirror, presto
Setting up Install Process
Loading mirror speeds from cached hostfile
* epel: mirrors.mit.edu
* remi: mirror.team-cymru.org
* remi-php71: mirror.team-cymru.org
* remi-safe: mirror.team-cymru.org
Package gcc-4.4.7-18.el6.x86_64 already installed and latest version
Package augeas-libs-1.0.0-10.el6.x86_64 already installed and latest version
Package openssl-1.0.1e-57.el6.x86_64 already installed and latest version
Package openssl-devel-1.0.1e-57.el6.x86_64 already installed and latest version
Package libffi-devel-3.0.5-3.2.el6.x86_64 already installed and latest version
Package redhat-rpm-config-9.0.3-51.el6.centos.noarch already installed and latest version
Package ca-certificates-2017.2.14-65.0.1.el6_9.noarch already installed and latest version
Package python34-3.4.5-4.el6.x86_64 already installed and latest version
Package python34-devel-3.4.5-4.el6.x86_64 already installed and latest version
Package python34-tools-3.4.5-4.el6.x86_64 already installed and latest version
Nothing to do
WARNING: unable to check for updates.
Creating virtual environment…
Installing Python packages…
Traceback (most recent call last):
File “/usr/lib64/python3.4/urllib/request.py”, line 1183, in do_open
h.request(req.get_method(), req.selector, req.data, headers)
File “/usr/lib64/python3.4/http/client.py”, line 1137, in request
self._send_request(method, url, body, headers)
File “/usr/lib64/python3.4/http/client.py”, line 1182, in _send_request
self.endheaders(body)
File “/usr/lib64/python3.4/http/client.py”, line 1133, in endheaders
self._send_output(message_body)
File “/usr/lib64/python3.4/http/client.py”, line 963, in _send_output
self.send(msg)
File “/usr/lib64/python3.4/http/client.py”, line 898, in send
self.connect()
File “/usr/lib64/python3.4/http/client.py”, line 1287, in connect
server_hostname=server_hostname)
File “/usr/lib64/python3.4/ssl.py”, line 362, in wrap_socket
_context=self)
File “/usr/lib64/python3.4/ssl.py”, line 580, in __init__
self.do_handshake()
File “/usr/lib64/python3.4/ssl.py”, line 807, in do_handshake
self._sslobj.do_handshake()
ssl.SSLError: [SSL: CERTIFICATE_VERIFY_FAILED] certificate verify failed (_ssl.c:600)
During handling of the above exception, another exception occurred:
Traceback (most recent call last):
File “/tmp/tmp.tI5jt82EWk/pipstrap.py”, line 165, in
exit(main())
File “/tmp/tmp.tI5jt82EWk/pipstrap.py”, line 146, in main
for url, digest in PACKAGES]
File “/tmp/tmp.tI5jt82EWk/pipstrap.py”, line 146, in
for url, digest in PACKAGES]
File “/tmp/tmp.tI5jt82EWk/pipstrap.py”, line 121, in hashed_download
response = opener().open(url)
File “/usr/lib64/python3.4/urllib/request.py”, line 464, in open
response = self._open(req, data)
File “/usr/lib64/python3.4/urllib/request.py”, line 482, in _open
‘_open’, req)
File “/usr/lib64/python3.4/urllib/request.py”, line 442, in _call_chain
result = func(*args)
File “/usr/lib64/python3.4/urllib/request.py”, line 1226, in https_open
context=self._context, check_hostname=self._check_hostname)
File “/usr/lib64/python3.4/urllib/request.py”, line 1185, in do_open
raise URLError(err)
urllib.error.URLError:
Bạn ơi xem giúp mình vs ạ
1. Bạn chạy lệnh
/opt/letsencrypt/letsencrypt-auto renew --no-bootstrapkết quả ntn2. Nếu vẫn không được, bạn gửi VPS qua support@hocvps.com mình xem trực tiếp cho. Chứ case bạn rắc rối
Mình đã gửi info VPS cho mail bạn rồi đó.. Bạn xem sửa lỗi giúp mình với. Mình xin cám ơn và chúc bạn một ngày làm việc hiệu quả!!
Done. Lỗi do chứng chỉ của bản thân VPS nên VPS không thể kết nối ra ngoài qua cổng HTTPS. Đã fix và update error vào 5.2
Nếu server không có cài hocvps script thì có làm theo cách này được không vậy admin?
Được bạn nhé. Phần cấu hình Nginx Conf bạn sửa theo server bạn
Cái Cron Tab auto renew sao không hoạt động ta ?
1. Bạn renew thủ công ra kết quả ntn?
2. crontab -l của bạn ra kết quả gì
https://imgur.com/a/r3cf3
Log đây bác: https://anotepad.com/note/read/6rab6t
anh ơi cho em hỏi chút, trên cùng một vps (1 ip) có cài được 2 website cùng chạy ssl không anh.
Được bạn nhé. Không giới hạn theo số lượng
Tại sao trên 01 VPS mình chạy 2 website thì cài 1 web nhận ssl còn 1 web thì không nhận ssl. Còn nếu tách mỗi web 1 VPS thì cài sẽ được cả 2. Admin có biết tại sao không giải đáp giúp mình
Chắc bạn cấu hình lỗi gì ở Nginx Conf. Cho mình Nginx Conf2 domain khi bạn cài trên cùng 1 VPS
Mình nén cả 2 file tại đây bạn. Mong admin xem giúp mình
https://tintuctoday.net/conf.zip
Oh. Block 443 của domain thì bạn không cài SSL. Bạn chỉ để mỗi ssl http2 nhưng phần đi kèm thì bạn không thiết lập, ví dụ ssl_certificate, key, cipher…
Chính là block có listen 443 ssl http2; và server_name tintuctoday.net;
Tương tự với site còn lại
Mình đọc vẫn không hiểu lắm. Admin có thể sửa qua giúp mình 2 file đó rồi gửi lại giúp mình cho mình tham khảo được. Cảm ơn admin nhiều
Bạn đọc file hướng dẫn trong bài viết đó. Block thứ 2 bạn có chèn thêm còn block thứ 3 bạn lại không chèn
OK Mình đã làm được rồi. Rất cảm ơn admin
Chào ad, mình gia hạn Let’s Encrypt thì báo lỗi :No renewals were attempted.
No hooks were run.
cách khắc phục thế nào ạ
Chứng chỉ bạn issue vào hôm nào?